Creating bookings for drivers and vehicles the old-fashioned way has always been complicated and difficult to manage. With Kimoby Go, creating bookings is easy and entirely centralized in one place. In the Bookings section, you can create valet, shuttle, or loaner-type bookings, view and manage all of your existing bookings, and even process payments for your bookings.
Quick Links
Creating a New Booking
There are three different types of booking that can be created in Kimoby Go: Shuttle, Valet, and Loaner Vehicle.
Shuttle Bookings
To create a new Shuttle booking:
- Click on the Kimoby Go tab.
- Click on the Bookings sub-tab.
- Click on New Booking.
- Under Customer, enter the customer name or phone number.
- In the Logistics drop-down menu, select Shuttle.
- Under Shuttle trip:
- Select whether this trip will be a Drop-Off (dropping off the customer at the dealership) or a Pick-Up (picking up the customer from the dealership and bringing them to their address).
- Enter the Departure Address.
- Enter the Destination Address.
- Enter the Return Address.
- Enter the Date and Time you want the booking to begin.
- Enter the Buffer Time.
- Click Calculate Trip.
- Under Driver, select the driver that will be driving the shuttle vehicle.
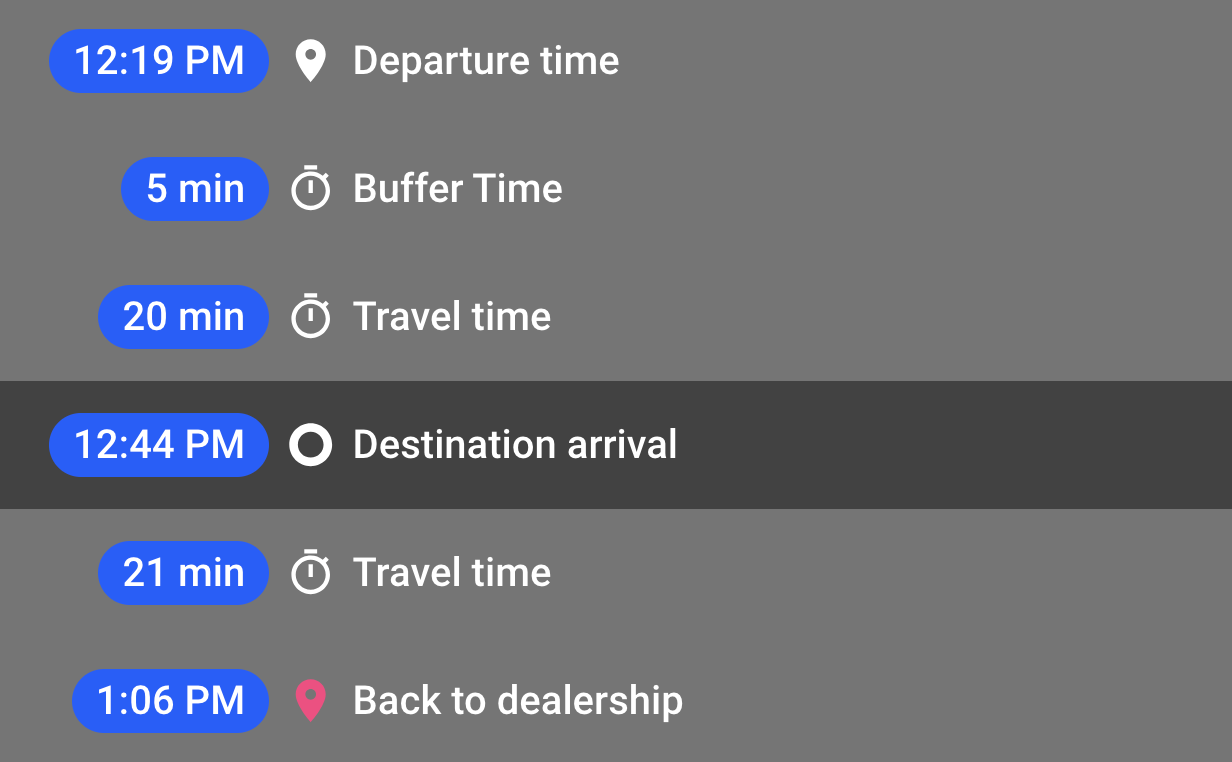
- Below this, there is an estimated timetable of the trip.
- Select Return Shuttle trip if you want to book the return trip right away (can be done later). Fill it out the same way as the initial Shuttle trip.
- Under Service advisor, enter the Kimoby user that will be in communication with the customer.
- Under Notes, add any additional notes to the booking.
- Click New Booking when finished.
Valet Bookings
To create a new Valet booking:
- Click on the Kimoby Go tab.
- Click on the Bookings sub-tab.
- Click on New Booking.
- Under Customer, enter the customer name or phone number.
- In the Logistics drop-down menu, select Valet.
- Under Customer Vehicle Info, enter the year, make, model, colour, and last 6 digits of the VIN of the customer’s vehicle that is to be picked up
- Under Valet trip:
- Select whether this trip will be a Drop-Off (dropping off the customer at the dealership) or a Pick-Up (picking up the customer from the dealership and bringing them to their address).
- Enter the Departure Address.
- Enter the Destination Address.
- Enter the Return Address.
- Enter the Date and Time you want the booking to begin.
- Enter the Buffer Time. This is how long you would like to leave a gap between this booking and the next booking.
- Click Calculate Trip.
- Select Loaner Vehicle if the booking will include a loaner for the customer to use.
-
If the booking includes a Loaner Vehicle:
- Enter the From Date (the date that the customer will be in possession of the vehicle) and the Return Date, if applicable.
- Under Vehicle, select the vehicle the customer will use. Alternatively, you can select a Vehicle Pool if you don’t want to assign a specific vehicle right away. Click here for more information on vehicle pools.
- Under Valet vehicle driver, select the driver who will deliver the loaner vehicle and valet the customer’s vehicle back to the dealership.
If the booking does not include a Loaner Vehicle:
- Under Shuttle driver, select the driver who will shuttle the valet vehicle driver to the customer’s address.
- Under Valet vehicle driver, select the driver who will valet the customer’s vehicle back to the dealership.
-
Below this, there is an estimated timetable part of the trip should take.
-
Select Customer vehicle return if the customer’s vehicle will be returned by a driver. Fill it out the same way as the initial Valet trip.
-
Optional step: Under Service advisor, enter the Kimoby user that will be in communication with the customer.
-
Optional step: Under Notes, add any additional notes to the booking.
-
Under Billing, select whether any fees will be credited. Enter the customer’s credit card information if needed (can also be done later).
-
Click New Booking when finished.
Loaner Vehicle Bookings
To create a new Valet booking:
- Click on the Kimoby Go tab.
- Click on the Bookings sub-tab.
- Click on New Booking.
- Under Customer, enter the customer name or phone number.
- In the Logistics drop-down menu, select Loaner Vehicle.
- Select Loaner Vehicle if the booking will include a loaner for the customer to use.
- Under the Loaner Vehicle section:
- Enter the From Date (date that the customer will be in possession of the vehicle) and the Return Date, if applicable.
- Under Vehicle, select the vehicle the customer will use. Alternatively, you can select a Vehicle Pool if you don’t want to assign a specific vehicle right away. Click here for more information on vehicle pools.
- Optional step: Under Service advisor, enter the Kimoby user that will be in communication with the customer.
- Optional step: Under Notes, add any additional notes to the booking.
- Under Billing, select whether any fees will be credited. Enter the customer’s credit card information if needed (can also be done later).
- Click Reserve Vehicle when finished.
Billing
The Billing section is where you can view and effect payments with Kimoby Go. Here you can checkout customers following a booking and charge them any related fees.
Billing a Customer
To bill a customer following a booking:
- Click on the Kimoby Go tab.
- Click on the Bookings sub-tab.
- Click on the Billing section at the top of the screen.
- In the table below, under the Payment Due tab, click on the customer you want to bill.
- A window called Booking detail will open containing the fees associated with that booking. See section below for more information on configuring fees.
- Under Card payment method, click on New to enter the customer’s credit card information if it is not already entered.
- Click Process payment.
Note
After you click Process payment, the customer will not receive a payment request as with a Kimoby Pay payment request. They will be charged immediately.
We recommend completing this part as soon as possible after the booking is complete, as the customer will only receive their invoice via text message after this part is complete, even if the invoice is $0.
Configuring Kimoby Go Fees
After clicking on a customer booking in the Billing section, the Booking detail window will open. Here, you can manage the fees that the customer will be charged.
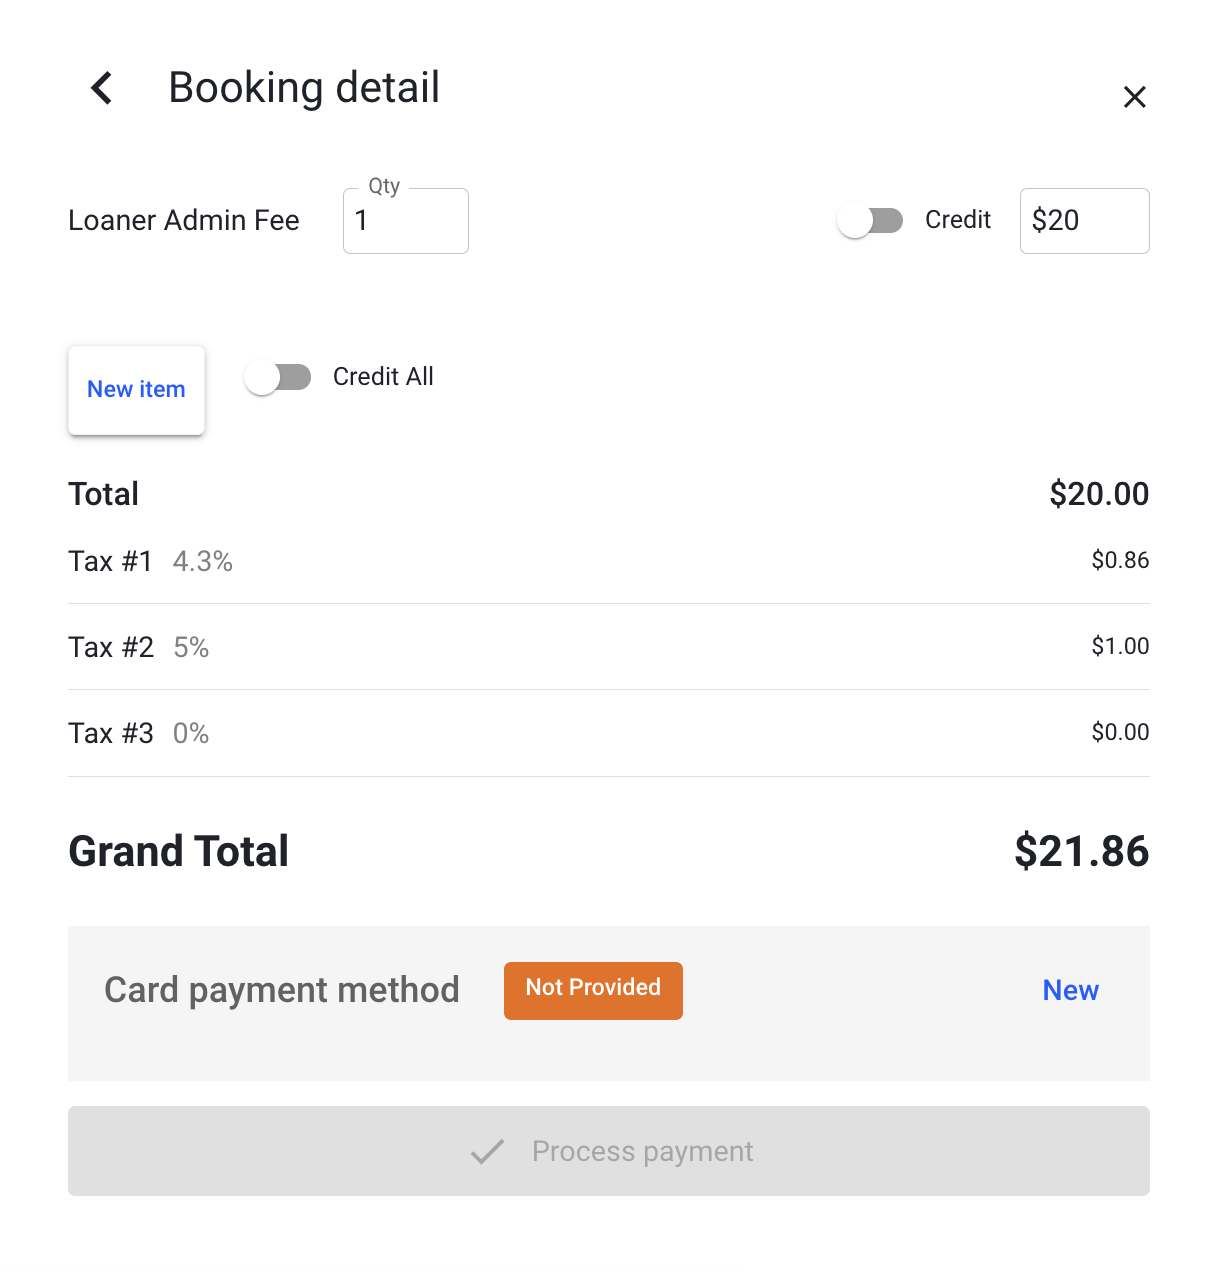 |
To add a new fee:
- Click on New item to add a new fee.
- Enter the name of the fee.
- Enter the quantity of the fee.
- Enter the amount ($) of the fee.
- Check the Taxable box if this fee will have taxes.
- Click on Remove to delete the fee.
You can also credit any of the fees in this window by clicking on the Credit button. The full amount will automatically be marked for credit, but the quantity and amounts ($) can both be modified.
 |