Sending instant messages to customers is a great way to connect with your audience, but personalization is the secret to increasing engagement. If the customers feel that the messages are automatically generated and not relevant to them, they will likely unsubscribe. Therefore, you must take the time to personalize messages with custom attributes or even emojis.
Instant messages that are tailored to each customer will help humanize the experience of receiving the information from a business. Customers will appreciate the extra attention, and the focus on personalization will make. your business stand out from the rest. By delivering helpful information relevant to your customer, you will increase their sense of trust and loyalty towards your business, leading to repeat sales.
Creating targeted instant messaging campaigns increases engagement and, in turn, boost revenue opportunities. Today, customers have high expectations regarding their interactions with your businesses and what to feel seen, heard, and understood. By sending personalized messages that address the customers' needs, you can feed this need for a high level of service and attention to details customers have come to expect.
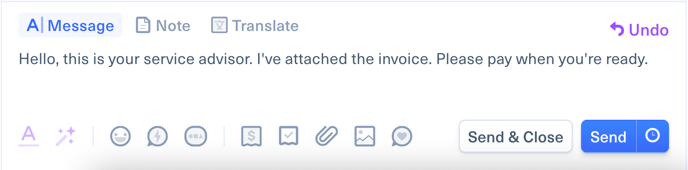
Kimoby's instant message editor makes it easy for you to create engaging messages that will generate results. Discover all of the features you can use the most out of your interaction with customers.
Quick Links
- AI Spellcheck Text
- AI Improve Text
- Emojis
- Saved Replies
- Custom Attributes
- Payment Requests
- Multimedia Files
- Review Requests
- Scheduled Messages
- Translator
- Internal Notes
AI Spellcheck Text
With AI, typos are a thing of the past! With the click of a button, you can ensure your text messages are flawlessly composed before they're sent.
To use AI to spellcheck your text:
- Open an existing conversation or click New message at the top-left of the page.
- Type a message in the editor.
- Click AI Spellcheck text. It may take a brief moment for the AI to correct your message.
AI Improve Text
No need to be a perfectionist! You can improve the quality of your text messages using AI Improve Text and ensure you’re conveying the right tone to your customers.
To use AI to improve your text:
- Open an existing conversation or click New message at the top-left of the page.
- Type a message in the editor.
- Click AI Improve text. It may take a brief moment for the AI to update your message.
Before AI Improve Text:

After AI Improve Text:
Using Emojis
Using emojis to personalize your messages is a great way to catch your customers' attention and lend a more casual feel to your communication style. However, make sure to respect the following best practices when including emojis.
- Use with moderation. More is less when using emojis. Not only will using too many emojis seem forced, but your message could also get rejected from your customer's phone carrier because it looks like it could be spam. Try limiting your use to two or three emojis per message as a general rule.
- Don't use emojis to replace words. Replacing words with emojis in your communication leaves room for interpretation, which in turn, leads to too much ambiguity. Think of emojis as an embellishment to words that will help draw attention to your message.
- Know your audience. As you start using emojis, take not of your customers' reactions. Are they replying with emojis? Is their tone serious? Adapt your communication style accordingly. It's possible that your customer is not a fan of emojis.
- Embrase go-to emojis. The most popular emojis are the ones you should be using in your message. Emojis help mirror real-life expressions missing from your messages, so use emojis that best illustrate what your facial expression would look like in person. Happy faces, thumbs up, and the wave emojis are all great options.
- Stay positive. Stay away from negative emojis, such as sad faces or thumbs down. Stay upbeat to make your message seem more positive and friendly.
Saved Replies
Creating Reusable Saved Replies
Saved replies help your staff respond to customer inquiries faster and with consistent professionalism. They are especially useful for messages that are sent frequently. Investing a few minutes to craft saved replies can save your team and your customers time.
Some example of frequently used saved replies include:
- Hello { customer.name }, we missed you today at { appointment.start_at_time }, at { company.name }. To reschedule your appointment, reply APP. Thank you and see you soon!
- Hello { customer.name }, we have a question regarding your [vehicle/ bicycle/motorcycle/etc.], could you please answer this message. Thank you! { company.name }
- Hello { customer.name }, your vehicle is ready! If you need a shuttle pick up please text "Shuttle" to arrange a time and location that works for you. Thank you! { company.name }
You can create a saved reply from the message editor.
- From the message editor select Saved Replies
 . If you have the permission to edit saved replies, you'll see a cog
  icon at the top right of the modal box.
 - Select Create a message.
- Add a title to your message.
- Write your message in the message box. You can personalize your message by clicking on Custom Attribute
 and add emojis by clicking on Emojis
  .
. - Select Create saved reply to save your message.
Editing Saved Replies
You can edit your saved replies in your company settings, and the changes made will apply to all users.
In Conversations
- From the message editor, select Saved Replies
 . If you have the permission to edit saved replies, you'll see a cog
  icon at the top right of the modal box. You will be redirected to the saved replies page.
 - Select the pencil
 icon next to the saved reply you wish to edit.
 - You can edit the title and message and add custom attributes and emojis to your message.
- Select Update saved reply to save your changes.
In Company settings
- Select your profile icon at the top right corner of your screen.
- Select Company settings.
- Select Saved replies in the sub-menu on the left side of your screen.
- Select the pencil
 icon next to the saved reply you wish to edit.
 - You can edit the title and message and add custom attributes and emojis to your message.
- Select Update saved reply to save your changes.
You can always discard any changes by clicking on the X at the top right of the modal box.
Deleting Saved Replies
Once a saved reply is deleted, it cannot be recovered.
- Select your profile icon at the top right corner of your screen.
- Select Company settings.
- Select Saved replies in the sub-menu on the left side of your screen.
- Select the Delete
 icon next to the saved reply you wish to delete.
 - Select Yes, delete it.
Inserting Saved Replies in Conversations
After creating and editing your saved replies, you can send them in conversations. In every message box, you will see the Saved Replies ![]() icon. Every time this icon is displayed, you will be able to use saved replies.
icon. Every time this icon is displayed, you will be able to use saved replies.
From a new message
From your desktop:
- Select New message.
- Search for a customer by name or phone number.
- In the message box, select the Saved Replies icon.
- Search and select the saved reply you want to send.
- Select Send.
From your mobile:
- From the Homepage Dashboard
 , select Send Message and from the Conversations
 .png?width=16&name=Sleep%20(100).png) tab, select the Send Message
tab, select the Send Message  icon.
icon. - Select Add customer
.png?width=16&name=Sleep%20(16).png) and enter your customer's name or phone number.
and enter your customer's name or phone number. - Select the Saved Replies
 icon above your keyboard.
 - Select the saved reply you wish to use or click on Search for a saved reply to find it.
- Select the paper plane
 icon to send your message.
From an existing conversation
From your desktop:
- Open the conversation with your customer.
- In the message box, click on the Saved Replies
 icon.
icon. - Search and select the saved reply you want to send.
From your mobile:
- From the Conversations tab, select the conversation with the customer to whom you want to send a saved reply.
- Select the Saved Replies icon above your keyboard.
- Select the saved reply tou want to use or flick on Search for a saved reply to find it.
- Select the paper plane
 icon to send your message.
Custom Attributes
Understanding Custom Attributes
Custom attributes are fields that are automatically filled in based on customer information and events. They're a great way to personalize messages and help make the interaction memorable.
They are three categories of custom attributes: Appointments, Customers, and Events. These are broken down into four types of attributes: Collection, Date, Number, and Strings.
- Collection: An array is a group of words. For example, if you want to note all the previously owned vehicles by a customer, you can regroup all his vehicle in that collection.
- Date: Any type of date will fall. into this type of attribute, such as the last oil change date, etc. This attribute requires a time frame.
- Number: A number has to be a whole number, such as the number of visits, the vehicle year, etc.
- String: A string is formed of characters, such as manes, vehicle models, etc.
You can view all your custom attributes by going into your Company settings.
- Select your name at the top right corner of your screen.
- Select Company settings.
- Select Custom attributes
 in the sub-menu on the left side of your screen.
Adding Custom Attributes
- From the message box, select the Custom Attributes icon.
- Select the custom attribute you wish to use in your message. You can search for a custom attribute or choose one by category: recently used, customer, use, or company.
- After inserting a custom attribute to your message, you will notice that it will be displayed in blue.
- You can add a fallback value to your custom attribute by clicking on the blue bubble. A fallback value is the value inserted in your message if Kimoby cannot find the correct information for your attribute. If the correct value cannot be found for your attribute and there is no fallback value, the attribute will simply not show in your message. When a fallback value is added, the custom attribute will be displayed in green.
- Select Send.
You can add as many custom attributes as you wish in your message.
Deleting Custom Attributes
You can delete a custom attribute, but be careful. Once deleted, it cannot be recovered, and it will delete any information under that attribute's name.
- Select your profile icon at the top right corner of your screen.
- Select your Company settings.
- Select Custom attributes in the sub-menu on the left side of your screen.
- Select the Delete
 icon next to the attribute you wish to delete.
 - Select Yes, delete it.
Payment Requests
Sending Payment Requests
Kimoby Pay is a simple, fast, safe, and convenient way for your customers to settle their invoices directly from their phones. Customers can pay when they want, and they will always know where their invoices are.
After setting up your Kimoby Pay account and getting approval, you can immediately send invoices to your customers either from a new message or an existing conversation.
- From the message box, select the Payment Request
 icon.
icon. - Enter the amount and reference number. Both are required in order to send a payment request.
- Type your message in the message box or click on the Saved Replies icon to use an existing message.
- Select Send.
In your customer's conversation, you will see the secure link of the payment request that was sent to your customer. Once the payment is complete, you and your customer will both be able to download their receipt.
Multimedia Files
Taking and Sending Multimedia Files
Sending videos and photos to your customers can better illustrate the message you are trying to convey. For example, when the customer can view a video of their vehicle inspection, they feel more trusting of your assessment. Furthermore, they can instantly approve the repairs so that your team can complete the work faster.
Note that multimedia files cannot be sent on its own without a message.
You can use any device to take photos and videos with an integrated camera or internet access, like a tablet or mobile phone.
- From a new message or an ongoing conversation, click on the camera
 icon above your keyboard.
 - You will be redirected to the camera on your device. Take the picture or video you wish to send to your customer.
- Select Use photo to attach it to your text messages. Wait until the photo or video is uploaded into your message, which might take a few seconds.
- Select Write message here... to write your text message or insert a saved reply.
- Click on the paper plane
 icon to send your message.
Sending an Existing Photo
Every time you see an image ![]() icon, you are able to attach photos and images to the conversation. You will see an image icon in your customer's conversation, appointment field, etc. You can even add files to the internal notes in each customer conversation. The image icon works exactly the same as attachments in emails.
icon, you are able to attach photos and images to the conversation. You will see an image icon in your customer's conversation, appointment field, etc. You can even add files to the internal notes in each customer conversation. The image icon works exactly the same as attachments in emails.
From your desktop:
- From any message box, click on the Join image icon
 .
. - Select the file you wish to send. It can be a .jpeg, a video, etc.
- Choose the recipient and write your message.
- Select Send when your message is ready.
From your mobile:
- From any message box, select the Join image icon .
- Select the file you wish to send. It can be a .jpeg, a video, etc.
- Choose the recipient and write your message.
- Select the paper plane icon to send your message.
You can also take a picture directly from the mobile app Homepage Dashboard:
- From the Homepage Dashboard , select Take Picture
 .
. - Take the picture you want to send to your customer.
- Select Use photo.
- If you want to send more than one file, you can do so by selecting Join another
.png?width=16&name=Sleep%20(35).png) .
. - If you want to send more than one video, you can merge them together by selecting Merge video together.
- Under Join to, Select Internal Note
.png?width=16&name=Sleep%20(83).png) if you want to add your file to an internal note or Message
if you want to add your file to an internal note or Message -1.png?width=16&name=Sleep%20(17)-1.png) if you want to add it to a message.
if you want to add it to a message. - From the internal note or the message, select Add customer and enter your customer's name or phone number.
- Write your message in the message box or insert a saved reply.
- Select the Add note icon to add your note to the conversation or select the paper plane
 icon to send your message.
Sending Files
Sending file to your customers can be helpful to send confirmation orders, invoices, quotes, estimates, or other documents. Every time a paperclip ![]() icon is displayed, you can attach files to the conversation. You can even add files to the internal notes in each customer conversation. The paperclip works the same as attachments in emails. Heavier files will be sent as links, so your customer will need an Internet connection to open them. Please take note that a file cannot be sent on its own without a message.
icon is displayed, you can attach files to the conversation. You can even add files to the internal notes in each customer conversation. The paperclip works the same as attachments in emails. Heavier files will be sent as links, so your customer will need an Internet connection to open them. Please take note that a file cannot be sent on its own without a message.
From your desktop:
- From any message box, select the Join file icon
 .
. - Select the file you want to send.
- Choose the recipient and write your message.
- Select Send.
From your mobile:
- From a new message or any ongoing conversation, click on the Join file icon above your keyboard.
- Select the file you want to attach to your text message. It can be a photo, a video, or a file.
- Select Write message here... to write your text message or insert a saved reply.
- Select the paper plane
 icon to send your message.
Sending Links
When you send a link to a customer in a text message, they won't see a preview of the website. This is because to see previews, your phone number needs to be saved in their phone contacts, otherwise, the link will only display as an URL.
From your desktop:
- From any message box, choose the recipient and write your message. Paste the link you want to send to your customer.
- Send your message.
From your mobile:
- From a new message or any ongoing conversation, select Write your message here... to write your text message or insert a saved reply. Paste the link you want to send to your customer.
- Select Send.
Sharing Files
When a file (any document, picture, or video) is sent or received in a conversation, you have the option to download or share that file to different locations within the app.
To download a file:
- Open the conversation that contains the file you want to share.
- Click on the file.
- Click on the Download
button.
To share a file within Kimoby:
- Open the conversation that contains the file you want to share.
- Click on the file.
- Click on the Share
button.
- Choose where you want the file to be shared (see options below).
- Message: This share option will send the file in a message to a customer. To share a file with a customer via message:
-
- Choose the Message
option.
- In the window that appears, enter the name or phone number of the customer you want to share the file with.
- Enter a message in the message editor.
- Click Send.
- Choose the Message
- Note (customer): This share option will add the file as a note in a customer profile. To share a file to a customer’s profile:
-
- Choose the Note (customer)
option.
- In the window that appears, enter the name or phone number of the customer whose profile you want to add the file to.
- Enter a message in the note box.
- Click Add note.
- Choose the Note (customer)
- Note (conversation): This share option will add the file as a note in a conversation. To share a file in a conversation note:
-
- Choose the Note (conversation) option.
- In the window that appears, enter the name or phone number of the customer whose conversation you want to add the file to.
- Enter a message in the note box.
- Click Add note.
- Repair order: This share option will add the file to a repair order. To share a file in a repair order:
-
- Choose the Repair order
option.
- In the window that appears, enter the name or phone number of the customer whose repair order you want to add the file to.
- Enter a message in the message editor.
- Click Add.
- Choose the Repair order
Review Request
Sending a Review Request
Take charge of your online reputation by sending review requests to your customers. By requesting feedback, you'll be able to increase the number of positive reviews by proactively monitoring your customer's satisfaction levels. The more reviews you have online, the more customers will trust your business.
Scheduled Messages
Creating a Scheduled Message
You can schedule a message to send at a later date and time. To do this:
- Create a new message or open an existing conversation.
- Type your message in the message editor.
- At the bottom-right of the message editor, click on the Schedule message
 button.
 - Choose a preset time to send the message, or choose Custom to set your own date and time.
- If you choose Custom, in the window that appears, choose the date and time that you want to send the message.
- Click Schedule message.
Once the message is scheduled, a banner will appear in the conversation confirming the date and time.
Note
You can include review requests, payment requests, estimates, and even photos and videos in your scheduled messages!
Modifying Scheduled Messages
Click on View message to view or edit the scheduled message. From this window, you can perform the following actions:
To edit the message:
- Click on the message editor.
- Edit the message in the message editor of the conversation.
- When finished, click Save.
To change the date and time you want the message to send:
- Under Send on, click on the calendar
icon to change the send date.
- Click on the clock
icon to change the send time.
- When finished, click Save changes.
To delete the scheduled message:
- Click on the Delete
button.
- A window will pop-up asking you to confirm. Click Delete.
Translator
Using the Translator
Don't let language barriers get in the way of providing excellent customer service. When starting a new message or going back to an ongoing conversation, you can translate your message in any language before sending it to your customer.
From your desktop:
- From a new message or any ongoing conversation, select Translate
 in your message box.
 - Type your message in the text area on the left of your message box and select the language you are writing your message.
- Choose the language you wish to translate your message to.
- Select the Translate icon to translate your message.
- After selecting the Translate icon, you can always edit your message and have it translated again, as many times as needed.
- Select Send.
Once sent, you can always view your original message by clicking on the arrow ![]() icon under your message.
icon under your message.
If you wish, you can translate a saved reply. If there are custom attributes in that saved reply, Kimoby will replace them with the customer's personal information before sending it.
From your mobile:
- From a new message or any ongoing conversation, select Translate in your message box.
- Type your message in the text area of message box and select the language you are writing your message.
- Choose the language you wish to translate your message to.
- Select Translate, you can always edit your message and have it translated again, as many times as needed.
- Select Add tanslation .
- Send your translated message by selecting the paper plane icon.
Translating Incoming Messages From Your Customers
Even if your customers speaks a different language, you can still use Kimoby to communicate with them, thanks to the translator. You can translate a message as many times as needed, in as many languages as you want.
From your desktop:
- Select the conversation of your choice.
- Hover over the message you wish to translate, and the Translate
 icon will appear on the right of the message.
 - Choose the language in which you wish to translate your message.
- The translation will appear right under the message. You can hide or display it by clicking on the arrow
 icon.
icon.
From your mobile:
- Select the conversation of your choice.
- Select the message you wish to translate and hold, and the Translate icon will appear on your screen.
- Choose the language in which you wish to translate your message.
- The translation will appear right under the message. You can hide or display it by clicking o the arrow icon.
Internal Notes
Writing Internal Notes
Internal notes help facilitate team collaboration by giving your teammates insight into the situation. Remember, internal notes will be invisible to the customer and can be deleted.
Internal notes are helpful for:
- Tagging another user to let them know why you are assigning them a conversation.
- Communicating internally for questions or comments.
- Attaching a picture as proof.
- Adding information about your customers.
From your desktop:
- From any open conversation, select Note
 in the message box.
 - In the yellow background box, you can write a note or attach any file or image.
- Select Add note
 .
.
From your mobile:
- From any ongoing conversation, select the Note icon at the top left of your message box.
- In the yellow background box, you can write a note or attach any file or image you wish.
- Select the Add note icon .
Tagging Users in Internal Notes
You can tag any users or teams in conversations or customer profiles in Kimoby. This can be helpful when you are assigning a conversation to another user or giving your teammate insight into a situation. Remember, internal notes will be invisible to the customer and can be deleted.
From your desktop:
- From any open conversation or customer profile, select Note
 above your message box.
 - In the yellow background box, select the Mention
 icon or enter the @ sign with your keyboard. A list with all your account's users will appear.
 - Select the user you wish to tag in your internal note. You can tag as many users in your internal note as you want.
- Select the add note icon to add your note to the conversation.
From your mobile:
- From any ongoing conversation or customer profile, select the Note icon at the top left of your message box.
- In the yellow background box, select the Mention icon or enter the @ sign from your keyboard. A list of all your account's users will appear.
- Select the add note icon to add your note to the conversation.
When you tag a user, they will instantly receive a notification in the app.
Replying to an Internal Note
When you reply to a user in an internal note, they will automatically be tagged in your reply.
- Select the conversation or customer profile where you want to reply to an internal note.
- Select the Reply
 icon next to the internal note.
 - Your message box will automatically switch to an internal note, and the user who tagged you will be tagged in your reply.
- Write your reply.
- Select Add note
 .
.
Deleting an Internal Note
You can delete any internal note added in your conversations or customer profile.
- Select the conversation or customer profile where you wish to delete an internal note. Hover over the note you wish to delete and a small Delete note
 icon will appear at the top right corner of your internal note.
 - Select Delete.
- Select Yes, delete.