Detailed Invoices (CDK and Reynolds Only)
CDK and Reynolds users can now benefit from an improved Kimoby Pay experience.
The new invoicing feature helps you provide clear and easy-to-understand invoices to your customers, so you can spend less time explaining and more time on higher-value tasks. Plus, by giving customers all the information they need to complete the payment, there are more chances they will use Kimoby Pay as their preferred method.
Make sure to personalize your invoice by adding your company logo and selecting your language of choice. That way, customers will feel more confident that your business is issuing the invoice.
Quick Links
Setting Up Your Invoices
Customizing your invoice will help your customers trust that it’s coming from your business.
Edit Logo and Language
- Select your profile icon at the top right of the screen.
- Select Company settings.
- In the Information tab (which is selected by default), upload your company logo.
- From here, you can also choose your language of choice.
Edit Payment Footnote and Estimate Footnote
Update your invoice with legal payment terms. You can edit the information that will appear on estimates or invoices you send to your customers, like terms and conditions, payment terms, tax ID, or other relevant details. You’ll protect yourself from misunderstandings and let your customers know what to expect from the transaction.
To access these settings:
- Select your profile icon at the top right corner of your screen.
- Select Company settings.
- Select the Estimates & Invoices sub-menu.
- Write your desired message under Payment footnote or Estimate footnote.
- Click Save changes when finished.
Sending Your Customer an Invoice
Invoices are client-specific, so you can only send invoices to select customers.

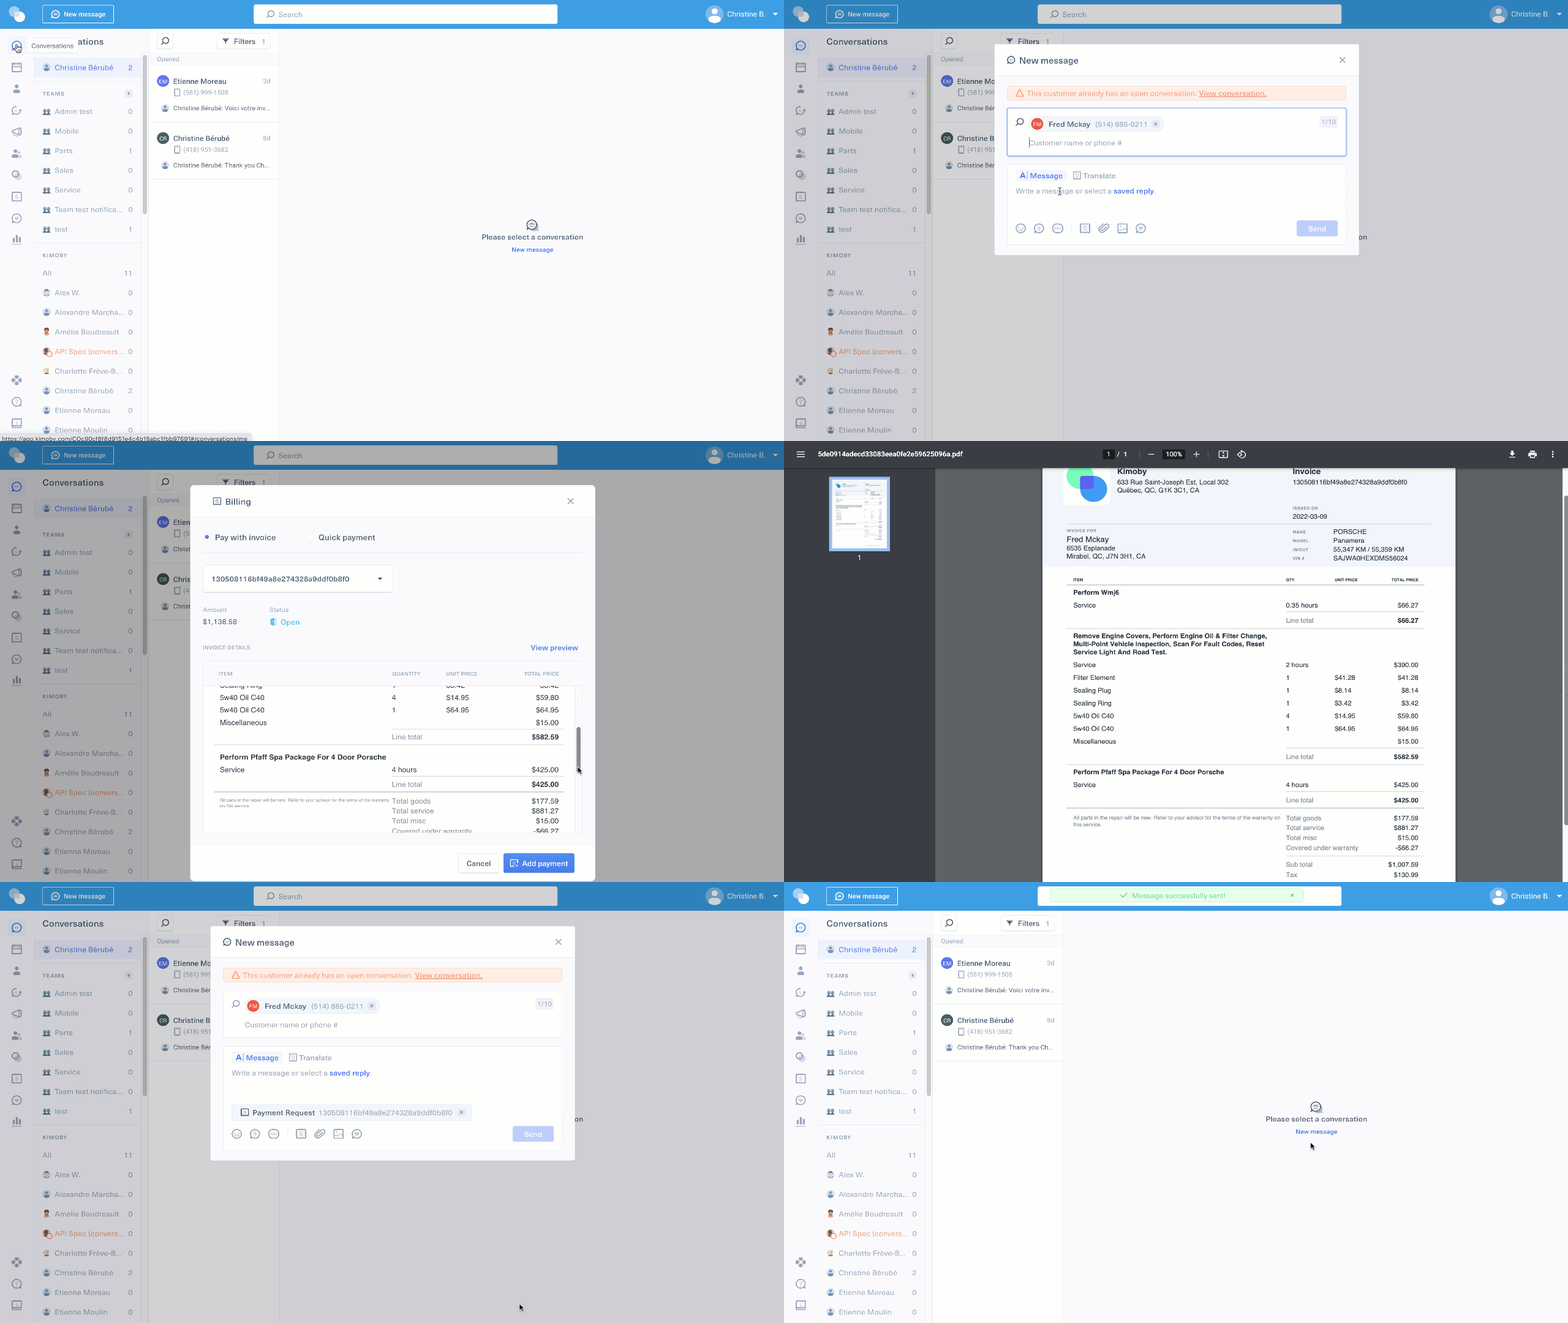
- Select New message at the top left of your screen.
- Enter your customer’s name or phone number.
- Select the Invoice
.png?width=16&name=Sleep%20(26).png) icon.
icon. - Select Pay with invoice.
- You can select the specific invoice you would like to send and use the search bar to filter through the invoices associated with that customer.
- From there, you will be able to see the invoice reference number, the amount, status, and details of the invoice.
- Select View preview to view the pdf version of that invoice.
- Select Add invoice
.png?width=16&name=Sleep%20(101).png) if the status of that invoice is closed or Add payment
if the status of that invoice is closed or Add payment .png?width=16&name=Sleep%20(101).png) if the status is open.
if the status is open. - Write your message in the message box or insert a saved reply.
- Select Send.
Alternatively, you can send an invoice in an existing conversation. Skip steps 1 and 2 and instead open a conversation from your Conversations list.
For more information on payment requests and how customers can pay them, see this article: